Introduction
During your project we will ask you for images to go on the new website and/or app. We recommend that website images should be your own photographs where possible. You are expected to supply these images correctly formatted. If we are required to format them for you, you will need to purchase our Optimising Images Extra.
When you supply us with the images for your project, or add new ones to your website yourself at a later date, you must follow the instructions below. If you choose not to follow the instructions precisely then the following are likely to happen:
- your website will be slow to load
- search engines will not understand what your images are about
- as a result of the above, your website will be down ranked by search engines and your website will appear lower down on the search engine results pages (SERPS).
Therefore, learning how to prepare images & PDFs for the web is time well spent. There are four main aspects of image formatting:
- the image’s dimensions in pixels (px)
- the image’s file size in kilobytes (Kb)
- the file name of the image
- the format of the image
Image Sources
It is a common misconception that Google images are free to use. Google indexes images the same as it does text, both of which will carry the owner/creator’s copyright.
Any ‘free’ images you want to use MUST have a public domain license and be expressly useable commercially.
The best source for images therefore, is to take your own photographs. And to create your own videos.
We will not agree to use anything that contains any image, logo, brand name, trademark or other feature that leads us to believe that you do not own the copyright to use the image/material.
Image Dimensions
Digital image sizes are measured in pixels (px). For example 1900px wide x 400px high. When we are building your project we will tell you the dimensions of the relevant images that you need to supply.
There are two methods of altering image sizes:
- Image cropping, which entails removing part of the original image so that the finished image is the correct size. The original proportions of the image are changed.
- Image resizing, which entails retaining the whole image but either making it smaller or larger. The original proportions of the image remain the same.
Sizes must be precise, so you will need to select images that will fit these proportions well when cropping. A portrait shaped image will not fit a landscape shaped space and vice versa.
If you have images that will appear within the text on your site’s pages and blog post articles, then they can be resized instead to keep the whole image intact if wanted. We suggest that the maximum width for ‘in page’ images is 800px and they can then be any height.
For product images we require them to be 700 x 700px. You can crop these or, to save time, take the photographs using the ‘square’ option within your smart phone or camera if it has one. As every device is different you will need to find any instructions online.
Image File Size
As important as the image file’s dimensions are, the image file’s size is critical to the speed of your website. Images need to be in the low kilobyte (Kb) size range, ideally no more than 500Kb.
It is relatively normal for a photograph from a camera to be megabytes (MB) in size. And for PDFs to be gigabytes (GB) large!
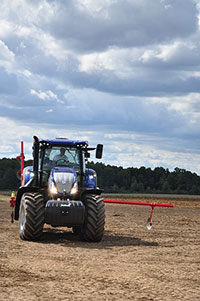
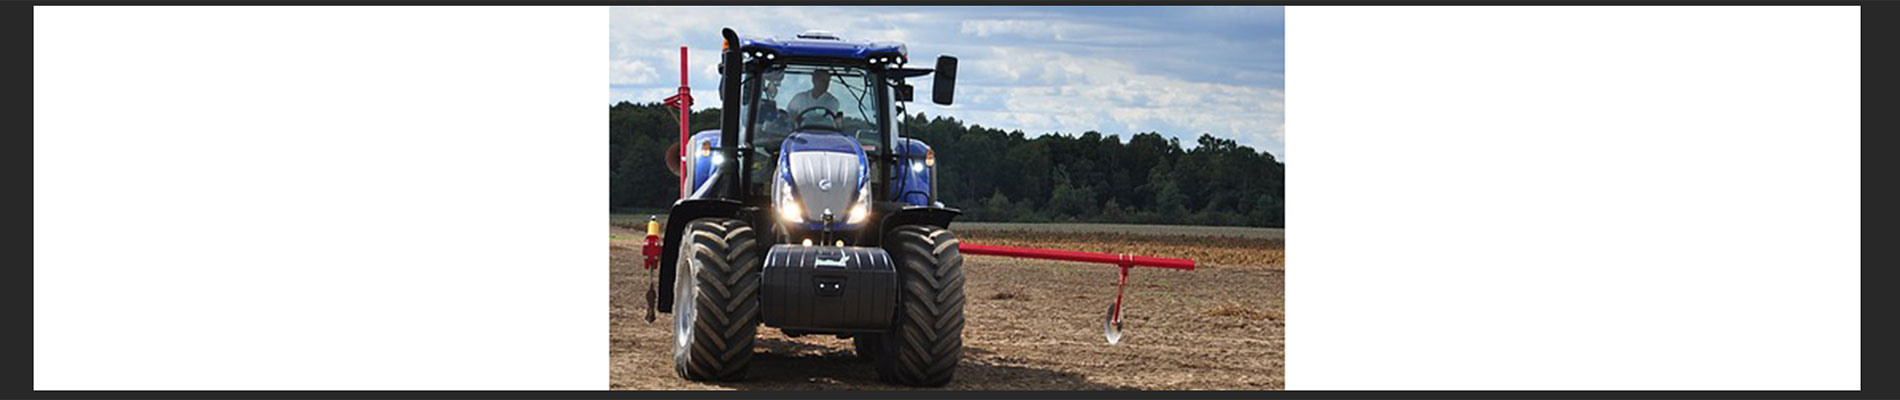
Aside from the original image below, the others are all 800 x 1204px in dimensions. However, I have saved three versions of the image, each with a different resolution. Which then reduces the file size of the image.
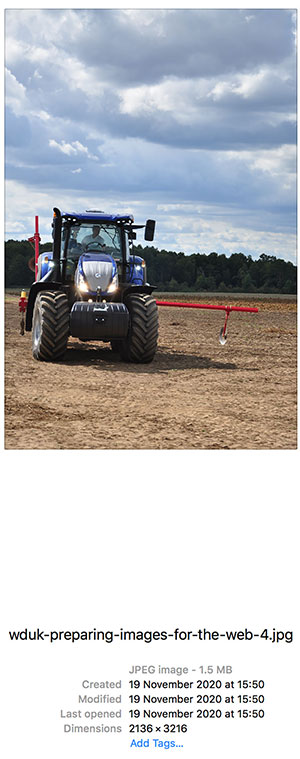
The original image is 1.5MB in size.
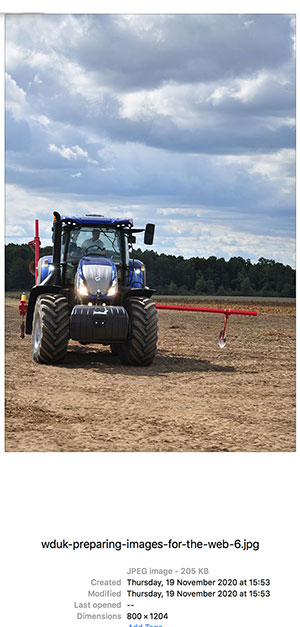
By reducing the dpi to 72 and then saving at a reduced resolution of 60%, we are down to 205Kb.
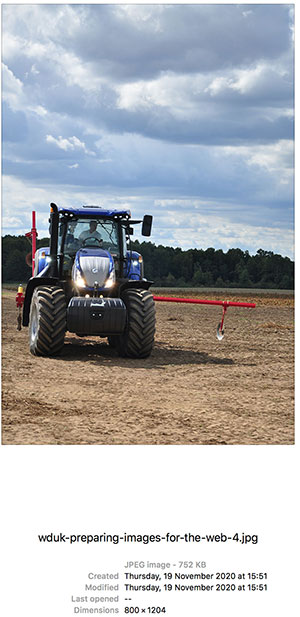
By reducing the pixels per inch (dpi) to 72 this version is down to 752Kb
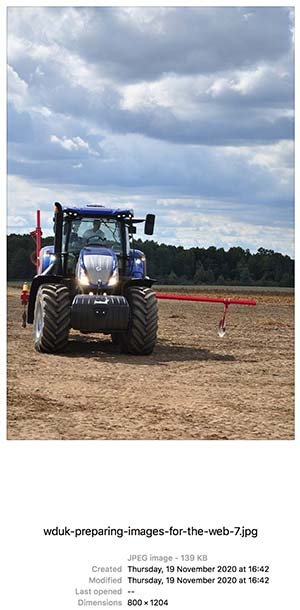
But saving at a reduced resolution of 40%, brings us to only 139Kb. Can you tell the difference?
Clearly, the first step to reducing the image’s file size is to set the resolution to 72 dpi. And then, using your graphics software, save them to the lowest quality image that will still look clear online. You may need to experiment with different qualities.
These are generally measured as a percentage of the image’s current resolution. For example, try saving an image at 40%. and see if it will still look clear on the internet.
Additionally, where possible enhance your images before sending them to us. Make them bright and colourful as appropriate, atmospheric and sunny if outside in daylight etc. Whether you or an external photographer take the photographs, be aware that dull images will look dull on the website.
See our knowledge base article Preparing Images for Print to see when large file sizes are required.
Image Filenames
More often than not, the intent of a website is to be found by search engines. Which in turn means it will be found by your target audience.
An image can be used in more than one place on your website, but no two images can have the same filename.
When naming your images to help with search rankings make sure they are named according to the SEO Focus Keyword for the page/post/category they are to appear on. The table below is a rule of thumb for naming your project’s images. If you have taken our SEO Research Audit & Strategy Report Extra then you will be fully aware of the key words that need to be incorporated per page.
Every page in your website needs its own SEO key word. And, for the search engines to feel your page is good enough to return as a search result, the images on said pages must include that SEO keyword in them.
See our Knowledge Base article ‘Understanding The Anatomy Of A Website‘ if you are unsure of any of the section names we use below.

If you are still in any doubt please let us know or purchase our ‘Optimising Images‘ Extra.
Image Formats
For most of the images on a website the image format we require is .jpg. With the exception of images that require some transparency within them, such as a logo over a background colour. In those cases the image format needed is .png
For documents that you want people to read and/or download you should be using PDF files.
Formatting PDFs
When naming a PDF please use a – between words rather than a space. For example: use ‘new-important-document.pdf’ not ‘new important document.pdf’.
The former will create a URL like this:
new-important-document.pdf, which is Google friendly.
Whereas the latter may create one like this:
new20%important20%document.pdf, which is not Google friendly.
PDF documents can be quite large so please make sure you do what you can to minimise their size. The method for this will depend on what type of computer and which software you are using. Here is an online guide that may help, otherwise you can do a Google search for ‘reduce pdf size online’.
Image Editing Software
There are various options for editing your images. However, we would recommend that if you want your website to look totally professional, then professional software will enable you to achieve this.
An online search shows that there are plenty of options, both free and paid.
We use Adobe Photoshop for image optimising and Adobe Acrobat for PDFs, As, mentioned above, if you do not have or want image software we can do the work for you with our ‘Optimising Images‘ Extra.